Why Dr. Bronner’s Hemp Castile Soap is Magic

Standard

shopping

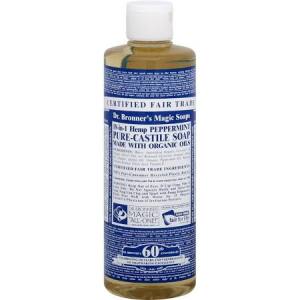
Simply put, Dr. Bronner’s Hemp Castile Soap is Magic. Alone, in combination with other all-natural products, any way shape or form, it’s wonderful. It comes in liquid and bar formula. Castile essentially means that it is made with vegetable based oils instead of tallow (animal). So it is very vegetarian/vegan friendly!

In case you aren’t aware of the many uses of Dr. Bronner’s, I would love to share some with you. They tout it as being a 1 in 18 use soap. I will touch on the ones that I currently find most useful, but please, research this because it can be a huge money saver and natural to boot!

1. As in a previous post, I used part of a bar of the soap in my DIY Liquid Laundry Detergent. Which has continued to work wonders for me. If you don’t feel like going through the process of making the liquid detergent, simply put a few squirts in your laundry and let it go. I’ve been there and it works just fine.

2. Cleaning. One part liquid soap to 40 parts (I won’t lie, sometimes I use more soap) and add it to a spray bottle. Clean away! I clean everything from my kitchen to my bathroom. If you need a stronger concoction, just add more Dr. Bronner’s!

3. Bathing. Of course if you buy the bar of soap, simply use the bar. If you have the liquid, dilute and wash away. Keep in mind it does not contain Sodium Lauryl Sulfate, so may not “suds” as your other soaps do. You are still getting just as clean! You can also use it to wash your hair, but will want to condition (trust me).

These three are the reason I most commonly use Dr. Bronner’s. I tend to have liquid peppermint as well as a mild bar on hand and have had success with using both for all uses. If you are interested in researching, others use it for everything from toothpaste to deodorant.

Give Dr. Bronner’s a chance! It is a true wonder!
 

Send Someone a Free Sample of Yogi Tea!

Standard

yogitea-730575

Yogi Tea has something called “Well-Wishes”, where you can send out a free sample of tea to a friend from their website. Send one to a friend, or, do what I did, and send one to yourself. 🙂

They let you choose your particular type even, so if you don’t feel like wasting the $4 or $5 for an entire box, this is a great way to test it! Body Wellness, Delicious-Wellbeing, Deliciously Energizing, Relax, Renewal and Rest are all up for grabs. I chose “Deliciously Energizing”. Well worth “liking” their Facebook page for, if you ask me! Have a great day!

http://www.yogiproducts.com/wellwishes

A Roux Based Potato Soup. My Favorite.

Standard

photo-22

Everyone has a favorite potato soup recipe. This is mine. 

Growing up, my mother was a health NUT (in more ways than one). I remember her using skim milk and it being a broth-y potato soup instead of thick and creamy. But, I loved it. I didn’t know any better! And now I do.

Ingredients: 

6 diced russet potatoes
2 cans chicken broth/stock (if you don’t have fresh)
1/3 cup of butter
1 (smaller) yellow onion diced
1/3 cup of flour
milk (3-5 cups…)
2 minced garlic cloves (use that garlic press!)
3-4 pieces of bacon
A little bacon grease reserved (to your preference, of course)
Salt and pepper to taste

Optional:

Cheddar cheese to top
Green onions to top

AND NOW FOR THE EASY PART!

1. Take diced potatoes and simmer in chicken broth until slightly undercooked. Reserve 1/4 cup of chicken broth.

2. Fry your bacon and reserve a small amount of grease.

3. Next, take the butter and melt it down in the pot you will be making the soup in. Add onion and garlic until onion is almost translucent.

4. Now, make your roux! A roux in this instance is simply equal parts butter and flour. Yes, your onion and garlic are still in there. Yes, it looks like a mess why you slowly mix the flour in. If this is your first roux, you will probably feel like you’re doing something wrong with the way it looks –kind of gummy (damn my not taking photos), but you’re not. Just gradually mix your flour with your butter and onions/garlic.

5. Now, begin adding milk. A higher fat content would be best; I tend to use 2%. I know I am very vague in saying 3-5 cups of milk. I don’t measure things typically and forgot to measure this last night. The main message here is to slowly add the milk so that it stays a consistent temperature so that the roux thickens (hence, creamy, luscious potato soup). I also keep mine thick because this is also when I like to add a 1/4 of a cup of broth/stock, it’s very flavorful.

6. At this point your potatoes should be done or have been done already and are just awaiting your return. Add the potatoes, crumbled bacon, and any bacon grease you have decided to reserve (you will want to taste test along the way).

7. Finally, salt and pepper. Let it sit for maybe ten minutes, especially if your potatoes are under done, but truly it’s ready to go when you are! We like to top ours with cheddar cheese and green onions. Sorry for the awful picture; I forgot until the last minute I was going to blog post about this!

Have  a beautiful fall day! I’d love to hear your additions, recipes, comments, etc.!

‘Tis the Season… Natural Flu and Cold Remedies

Standard

the-flu-virus-rckqwtcz

It happens to all of us at some point… maybe not this year, maybe not the next, but eventually –you will be thankful you have read this post. Being strongly against inoculations for various reasons, I tend to get sick every couple of years (though I’m not blaming not being inoculated), and that’s ok. I just make sure that I am armed with information on how to take care of myself naturally.

While researching this, I found that Mother Earth News and I have a lot of the same standpoints on what to do when sick with the cold or flu. I will link to the website at the end, along with a couple of others that have more concoctions.

WATER!

We all know that we should consume water when sick. Depending upon age, our bodies range from being 50-75% water. To me, that’s a dead ringer. I have heard from a nurse that especially when vomiting, it is important to consume small amounts to ensure that you can “keep it down”. Stay hydrated!

Another interesting and helpful thing to do using water is boil it and take advantage of the steam. Throw a towel over your head and breathe from the most congested orifice (mouth, nose). If you have essential oils on hand, two popular additions would be a couple drops of eucalyptus or rosemary. If you choose to use peppermint, go easy!

VITAMINS

The only vitamin I’m going to push here is C. Vitamin C has had countless studies as to its efficacy in helping the common cold. It doesn’t mean overdose on it (while that has shown helpful for other things, such as diseases, it is unnecessary now), it just means keep a good 200-500 mg in you daily. Don’t forget vitamin enriched foods such as peppers, citrus fruits, strawberries and leafy greens if you are able to eat.

COMMON SENSE

A lot of people lack this common sense approach… rest a lot, sleep a lot, eat well (fruits, veggies, whole grains), wash your hands and sneeze into your arm.

RANDOM EXTRAS

If you are nauseated, I cannot speak highly enough of the use of ginger. I, unfortunately, suffer from nausea a lot, and I use an awesome tea by Traditional Medicinals called “Ginger Aide”. Alternatively, I have a friend that suffers the same condition that uses pickled ginger.

For a general upset stomach, we have probably all heard of using peppermint. Peppermint can attribute its healing power to menthol, which peppermint oil consists of 78%. Put a drop in your herbal tea (or really whatever you feel you can stomach) to benefit.

As for thing such as body aches, peppermint can again come in handy. Run yourself a hot bath and use 10-15 drops of peppermint in the water.

Alright, while there is much more to this subject, I’ll leave it at that. If you actually care, you’ll research it yourself anyway! Here is the link the the Mother Earth News article as well as a blog post that has concoctions. Have a beautiful fall day!

http://www.motherearthnews.com/natural-health/effective-natural-cold-and-flu-remedies.aspx?PageId=1

http://girlmeetsnourishment.com/30-homemade-natural-cold-flu-remedies/

http://www.disabled-world.com/artman/publish/cold-remedies.shtml

Nutella Gem Cookies

Standard

I have been craving Nutella… and cookies… lately, so when I saw this I just had to repost. These look delicious and EASY! I will be making these very soon.

The Crunchy Sunflower

nutellagemcookiesAs we did a bit of work around the house this afternoon, I thought some cookies might be in order. Too, today has been quite chilly, and so heating up the kitchen a bit sounded quite nice. Of course, my energy is quite low today despite lots of coffee; anything I made had to be easy.

After considering the ingredients that we currently had on hand—mainly a tube of sugar cookie dough and an almost-empty tub of Nutella—I did a bit of quick searching on the internet. What did I find?

Voila! Nutella Gem Cookies!

These cookies were definitely easy to make. I was pulling the first batch from the oven when my husband walked in the kitchen.

“Did you just make these?” he asked.

“Yes, of course,” I acknowledged.

“You are amazing,” he replied as he grabbed a couple of cookies.

And the verdict? My husband thought they…

View original post 57 more words

DIY LIQUID Laundry Detergent… Lose the Chemicals!

Standard

photo-21

DIY LIQUID LAUNDRY SOAP! Okay, I don’t know about you, but I spend a small fortune on laundry detergent. Between my being a woman and Michael being a chef (gross chefs’ clothes), we go through quite a bit. And we are both allergic to certain brands. Awesome. So, yeah, this is a great way to not only have safer detergent, cheaper detergent, but also hypoallergenic detergent. WIN! It looks time consuming –it’s not. Making liquid detergent just has a few steps, but doesn’t take but a couple of more minutes. This is a TWO GALLON recipe (adjust as needed) and you only use half of a cup a load! Makin’ it rain.

Shall we start?

INGREDIENTS:
1/2 cup Borax
1/2 cup Washing Soda
1/3 Bar of Soap

4 cups hot water
6 cups water
1 gallon water

STEP 1:

 allingredients

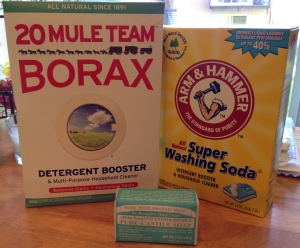
Gather your weapons, soldier. It only requires three, but I throw in an extra at the end. Borax (WASHING not baking) soda, and a bar of soap. The first two ingredients can be found in… surprise! Your detergent isle.

photo-17

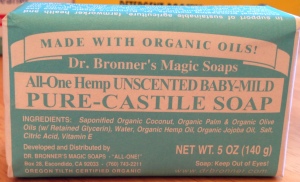
This is the soap that I use. Dr. Bronner’s truly is magic (and I will have a future post entirely surrounding how you can use these wonderful products), but I like this one in particular because it is unscented and mild. Sounds pretty safe to me!

STEP 2: 

grate gratedbowl

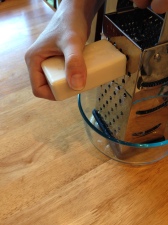
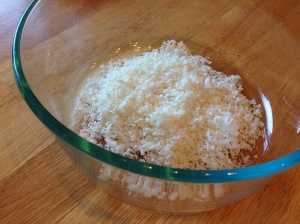
Grate 1/3 of a bar of your soap. Reserve.

STEP 3:

 photo-20 

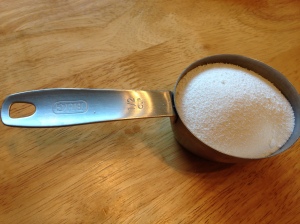
Measure out 1/2 of of cup of Borax and a 1/2 cup of Washing Soda. Reserve. (They look exactly the same, I just used one picture.)

STEP 4: 

 meltingpot

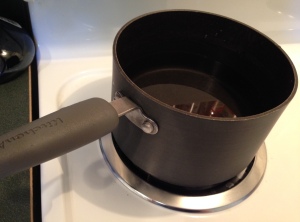
Now, you are going to add 4 cups of hot water to your soap in a large pot on the stove (I have one large enough, that’s part of the reason I say adjust your measurements if you don’t have the necessary tools/don’t need as much, whatever).

STEP 5:

 pouringborax

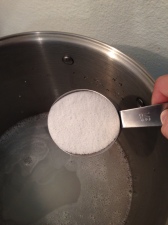
Add the Borax and Washing Soda. I put my stove on almost medium and let it sit, but stirred semi-frequently to make sure the soap doesn’t bind to the bottom of my pot. Keep on stove until all is melted/dissolved, then remove.

STEP 6:

 photo-19

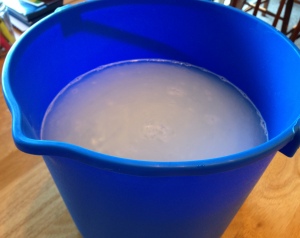
You will need to add 4 cups of hot water almost immediately after removing the pot from the stove. Now, if you started this process in something smaller and planned on finishing the “two gallon” size off in a bucket of some short, this is where you would pull the bucket or whatever you have chosen. I used a cheap blue bucket that we have for cleaning purposes.

STEP 7: Now that you have your largest container that will be used for the project, add an additional 6 cups plus 1 gallon of water to your concoction. Stir and let sit for 24 hours. I know, the waiting is the hardest part. I wanted to post this yesterday sooo badly! But I waited.

STEP 8:

 photo-18

You’re DONE! It really isn’t gel like and I have read others likening it to the consistency of egg drop soup. It’s oddly true! Use old milk jugs, old laundry detergent jugs, anything you can come up with to store it in. You’ve got a pretty solid shelf life with this stuff!

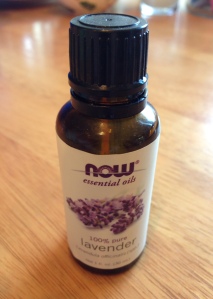
Now, for my special addition (because I use unscented soap… and I love lavender):

OPTIONAL STEP 9:

 oil

Essential oil. I am not sure how many drops I used, I just went to town. I love essential oils! I think orange would smell excellent as well.

Alright people, I’ve got laundry to do. Don’t look at this recipe and feel overwhelmed. I did at first. It’s SO EASY it’s almost too easy. And think about those dollar bills and nasty chemicals…

What the Kale?! Kale Chips, That’s What.

Standard

I love kale. I really don’t think it can be said enough. It is so versatile: salads, soups, smoothies, and yes –even chips. Today I made my first batch of chips, so don’t think this is a perfected recipe, just something to start with. Google the crap out of it if you feel so inclined, but first and foremost, just go with your instincts! It’s easy, tasty, cheap and considered one of the greatest superfoods that exist! Kale is packed with vitamins K, A, and C as well as many other nutrients. Healthy and freakin’ delicious.

Ok, so let’s get started!

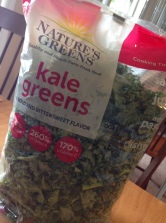
Step 1: Get yourself some good ol’ kale. I don’t typically buy mine pre-bagged, but that is all my grocery store had and I missed the farmer’s market on Friday night. So deal with it. This is the brand I used:

kale bag

It really wasn’t bad quality and was a stuffed bag for $2.50. I won’t complain about that.

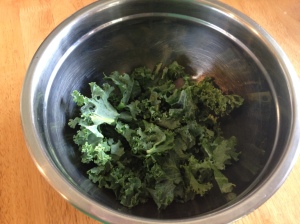
Step 2: Take the kale (I used just 2 cups for a trial run, but it seems there are no boundaries or rules when making kale chips –temps and all, do as you see fit!) and make sure it is as dry as you can get it. Especially if you are buying heads of kale, it will be quite wet, so use a towel of some sort and dry that stuff out. Also, if you buy heads of kale, vs. my ridiculous bag, you will want to remove the stalks.

photo-18

Step 3: Rip up/cut up the kale so it’s not a mess when you eat it. It doesn’t need to be tiny pieces, however, because it will bake WAY down.

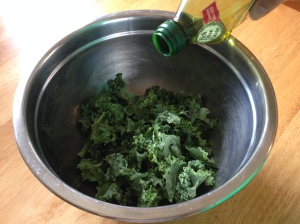
Step 4: Toss the kale with olive oil. I say a head of kale would take a good 2 tablespoons of olive oil, possibly a dab more. At this time I added course sea salt as well as freshly ground pepper to taste. You can use anything though! The possibilities are endless! I’m going to use some balsamic vinegar next time. I’m sucker for balsamic. Ahhh…

Kale olive oil

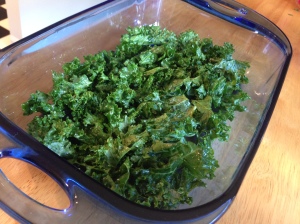
Step 4: Arrange the kale onto its baking dish/sheet. I prefer to use glass, so that is what this recipe is based upon, but you can bake it on a cookie sheet if you please. Make sure it’s not piled on top of itself –it all needs to be open and touching the bottom.

photo-19

Step 5: BAKE THAT SHIT! 350 degrees for 10 minutes, then flip the kale and bake another 10 minutes. Watch it towards the end –you don’t want it to brown. Let cool (doesn’t take long!) and then eat some SUPERFOOD!

end

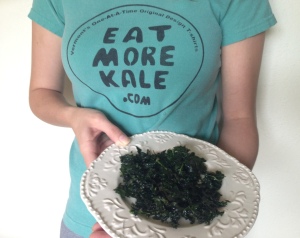
Yes, I own that shirt. And bumper sticker. GO KALE!

And so it begins…

Standard

Hello, hello! Most of you visiting this blog at its first post probably know me, so I’ll keep it brief.

I have recently had the luxury of becoming a very frugal Stay at Home Hippie. Having always wanted to start a blog, I thought this would be the perfect opportunity. I make a lot of my own household items naturally, love to cook (and will learn to do so frugally –though at times will splurge), and think that I can contribute some great health and other information that you might not otherwise read.

I am extremely “into” mental health, and physical health, too. Holding a degree in the mental health field, and having worked with the mentally and physically ill, I have learned quite a lot. Being a sucker for knowledge, you can count on whatever I am doling out on this blog to have been researched thoroughly before being posted.

With all of that being said, I do think we could all scale back in our lives materialistically, monetarily, etc. That doesn’t mean that we have to live like crap. So, let’s learn together how to live in a more frugal, mentally, and physically healthy manner!